Main Menu
Main Menu#
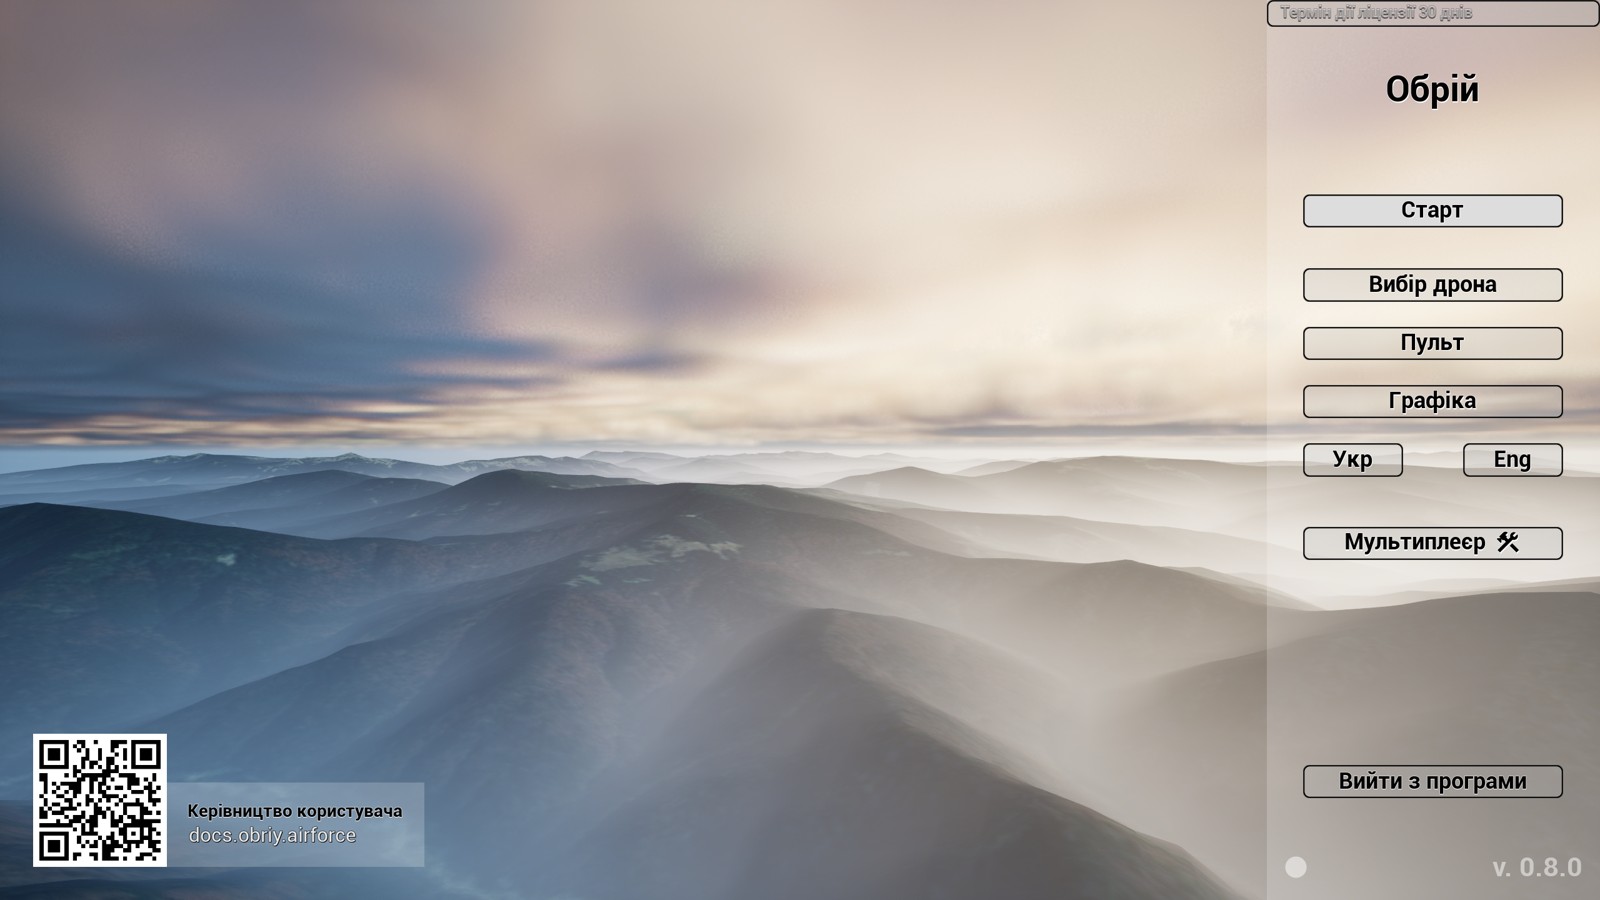
In the top-right corner, the button displays how many days the license remains valid. Clicking it opens a menu where the license can be updated. The license can be updated even in advance while it is still valid. At the bottom is a circle indicating the network status for update checks: solid means successful, empty means failed. The version number is also shown here. If a newer version is available, this text will change color to orange. Hovering the mouse over the version reveals the available update. In the bottom-left corner, there are active links to the current documentation.
The main menu contains three submenus that need to be opened before the first launch.
Drone Setup Menu#
This menu lets you choose different drone models and configure their additional parameters.
Note that the required controller channels vary depending on the selected drone. For example, an FPV drone needs four motor control channels, as well as Arm, Flight Mode, and (Bomb — for drones with a bomb drop feature).
Meanwhile, a reconnaissance drone requires Flight Mode, Camera Pitch, Camera Zoom, and Bomb.
FPV Drone Menu#
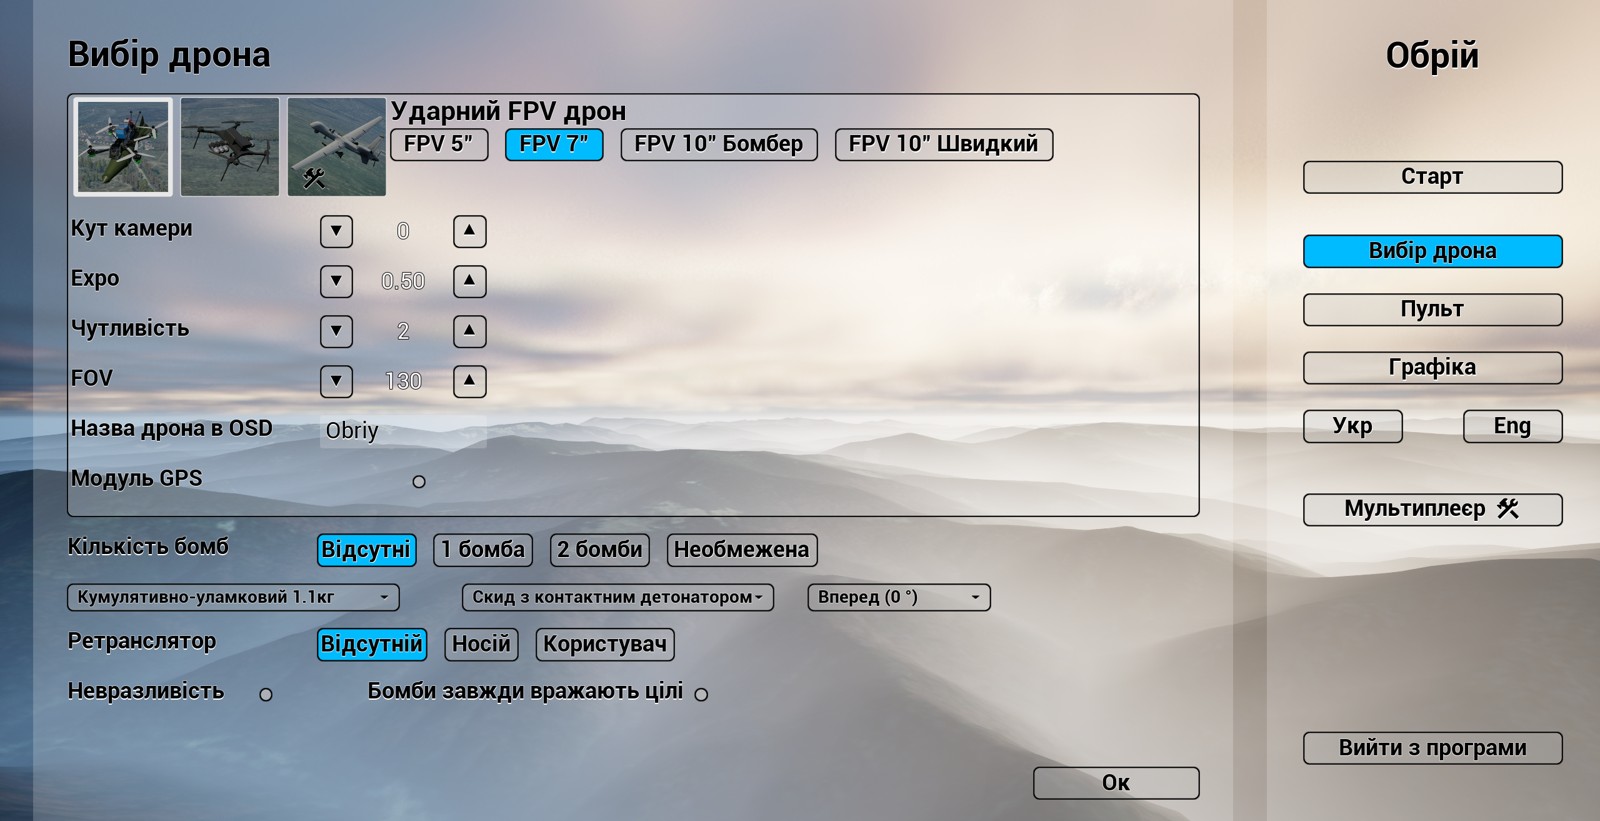
This menu offers the following options:
- Choose between 5”, 7”, or 10” FPV drones. FPV 5 (with 5-inch propellers) is better for free flight, while FPV 7 and 10 are more suitable for long-range flights and carrying payloads.
- Camera tilt angle (not recommended to set it at more than 30 degrees — otherwise, Roll and Yaw may switch places)
- Expo – stick curve tuning
- Sensitivity – PID aggression
- FOV – camera field of view
- Drone name on the OSD
General settings for all drone types include:
- Number of bombs: relevant for kamikaze and bomber drones. Options differ for FPV and gimbal drones. If desired, you can enable unlimited bombs. In this case, new bombs will appear on the mount after each drop. This is useful for drop training.

- Bomb type -
For FPV drones, it's best to use one bomb weighing 1kg or 1.5kg. A 10” drone can carry up to 1.8kg. Keep in mind that bomb physics is still very limited.
- Fuse type - all four types are generally suitable for FPV drones.
- Munition mounting orientation
- Invulnerability – prevents the drone from being destroyed, even if it hits a target, crashes, or is shot by infantry
- Bombs always hit targets – significantly boosts bomb effectiveness and allows damage to tanks even with a 250g bomb
Reconnaissance Drone Menu#
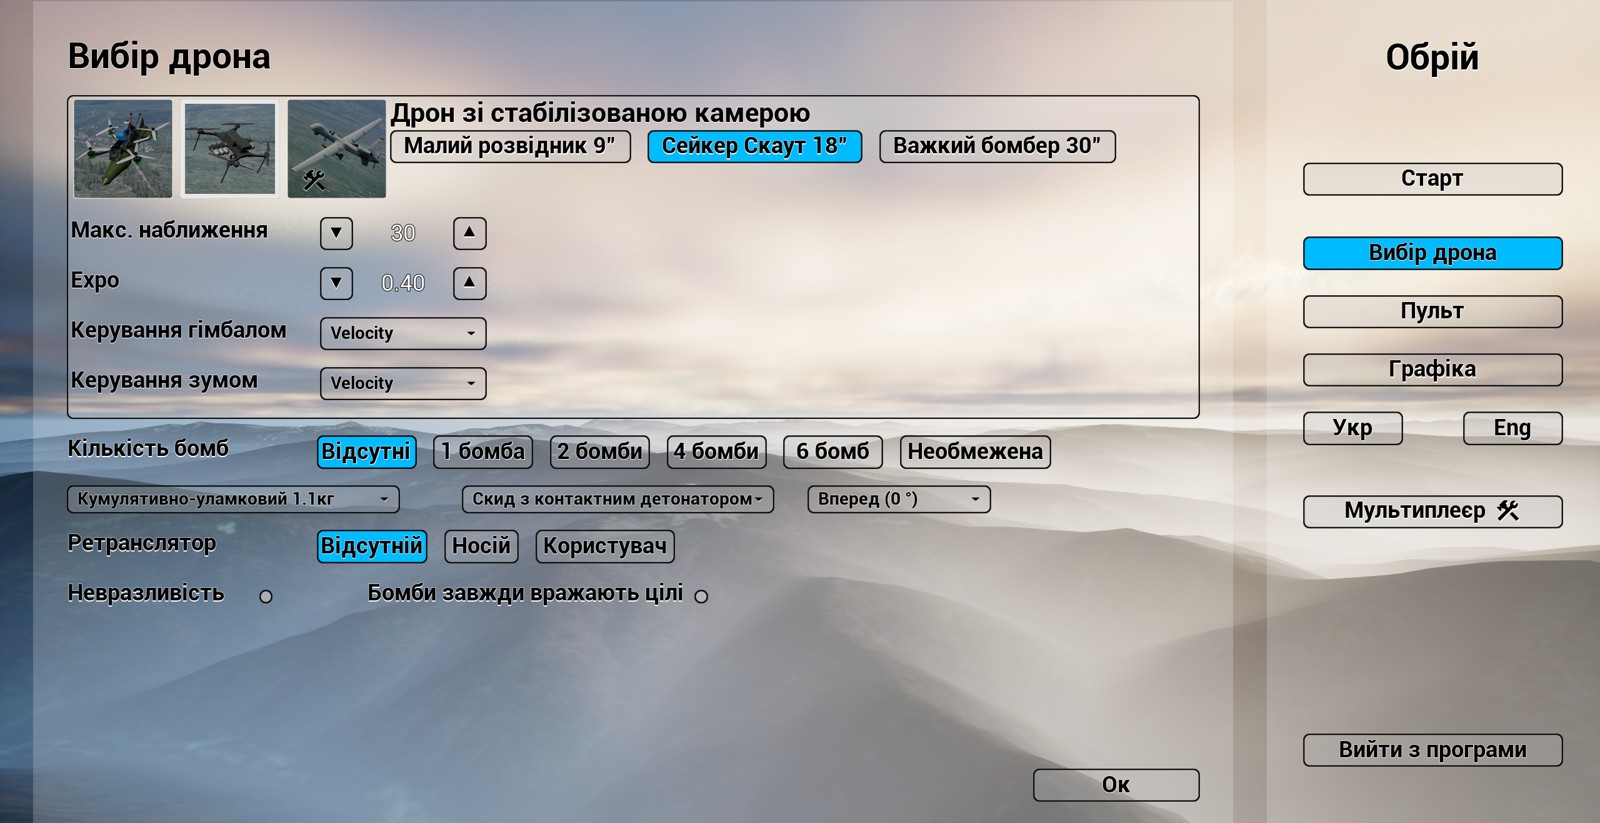
The key parameters of a recon drone are the camera and zoom control methods.
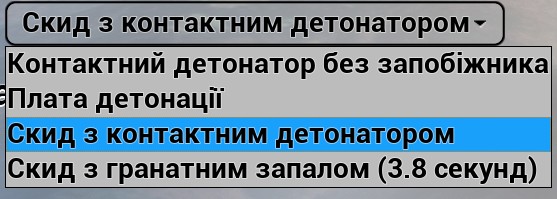
For gimbal drones, the recommended fuses are “Bomb drop with a contact fuse” and “Bomb drop with a grenade fuse (3.8 seconds)”.
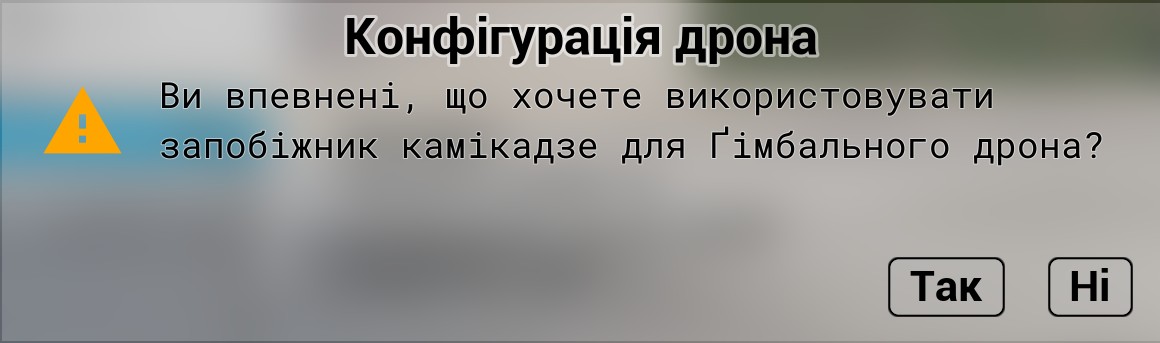
You can also choose a kamikaze fuse, but the simulator will ask for confirmation to ensure the pilot did not select it by mistake.
Controller Menu#
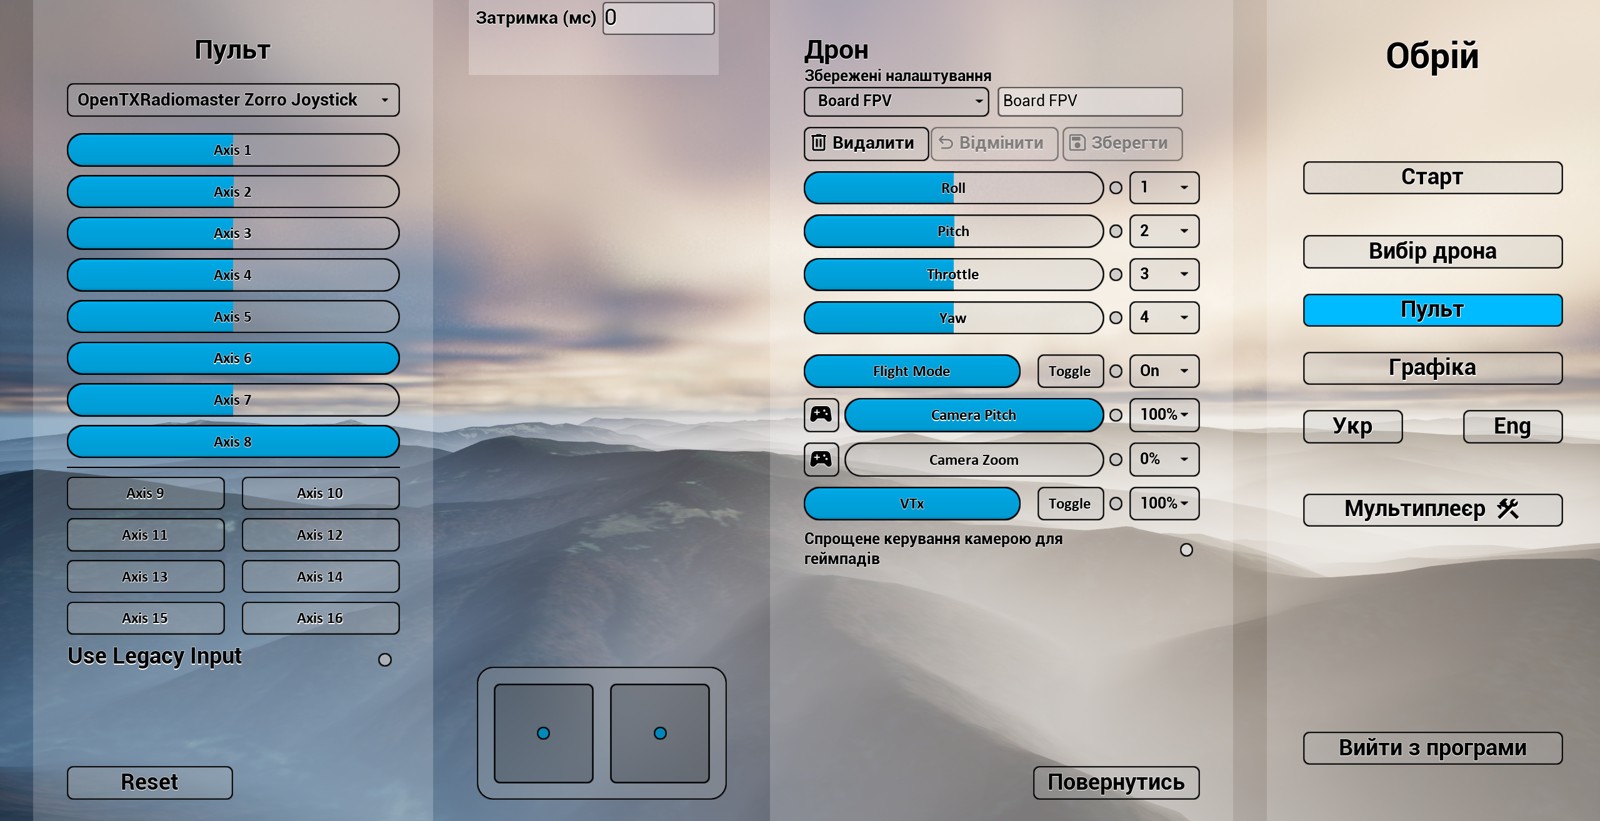
This menu allows you to remap buttons and switches on the controller that are responsible for drone control. On the right side of the interface, you’ll see the following terms:
Roll – the drone's left-right rotation. A negative Roll tilts left, and a positive Roll tilts right. Roll is usually the horizontal axis of the right stick.
Pitch – the drone's up-down tilt. Typically, negative Pitch tilts the drone upward, resulting in backward movement. Positive Pitch tilts it downward, resulting in forward flight (as the drone leans forward in the direction of thrust). This axis may be inverted, depending on your setup. Pitch is usually the vertical axis of the right stick.
Yaw – the drone's left-right rotation around its vertical axis. Negative Yaw turns the drone left; positive Yaw turns it right. For FPV drones, if the camera tilt is not 0 degrees (i.e., not pointing perfectly forward), Yaw may feel like Roll and vice versa. Yaw is usually the horizontal axis of the left stick.
Throttle – the axis that controls overall motor power. Negative Throttle is minimum thrust; positive Throttle is maximum thrust. Throttle is usually the vertical axis of the left stick.
Flight Mode – selects a flight mode. On FPV drones, negative Flight Mode is Angle (Stabilize), and positive Flight Mode is Rate (Acro, Air). The first mode is used for takeoff, landing, and sometimes for precise maneuvering in tight spaces or to pass through a zone under the influence of electronic warfare systems. The second is the most common and well-known mode for FPV drone control.
Camera Pitch and Camera Zoom control camera pitch and zoom respectively.
Arm is the axis that enables and disables the motors in the FPV drone menu. To launch the drone, move Arm away from you, then set Throttle to the minimum, and finally raise Arm to the maximum position. If you try to arm the motors with positive throttle, the drone will ignore the command. The simulator's Arm implementation mirrors the behavior of the Betaflight firmware.
Controller Setup#
In the Controller section, check whether the simulator correctly detected your controller.
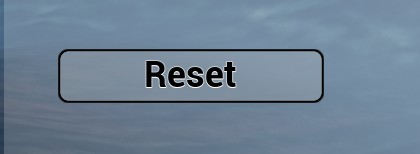
If the software doesn’t recognize the controller, pressing the Reset button in the bottom-left corner of the screen may help. This triggers a rescan for connected controllers and may detect it. This step was mandatory after plugging in the controller in versions up to and including 0.6.4.
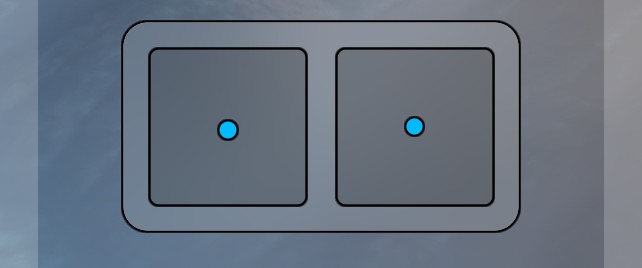
To configure the controller, ensure each controller axis matches the corresponding drone axis in the simulator. A central visual guide helps with setting up the four main axes.
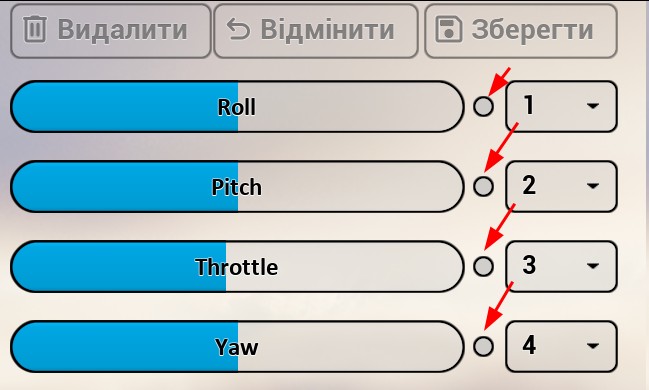
Each axis can be reversed by clicking the white (or blue) dot to the right of the axis. The numbered block indicates which controller axis maps to each drone control axis.
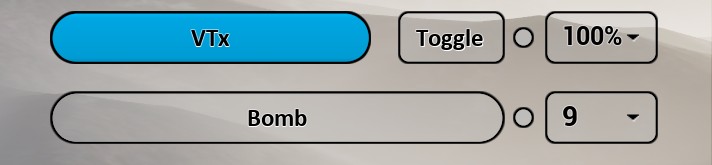
There is a special button mode activated via the Toggle button. By default, extra control axes read controller channels directly, which isn’t convenient when using controller buttons — they would have to be held down constantly. If you click the Toggle button, the axis indicator becomes square and starts responding to button presses instead. In this mode, a positive signal from the controller toggles the state instead of being read continuously. For example, assigning the Flight Mode axis to a button will let the first press switch to Rate mode and the second press switch back to Angle.
For camera controls, a rounded-corner axis indicator means it expects input from a rotary switch (dial) on the controller. Square corners mean it expects controller button input.
Next, verify that all control axes — Roll, Pitch, Throttle, Yaw — are working correctly. Stick movements on your transmitter should match the points moving on the screen guide.
You also need to manually assign the necessary channels for Arm, Flight Mode, and Bomb.
Check which channel each switch is on (shown on the left), then assign that channel to the appropriate function on the right.
Warning
Switches won't appear in the simulator until they are configured in the controller model.
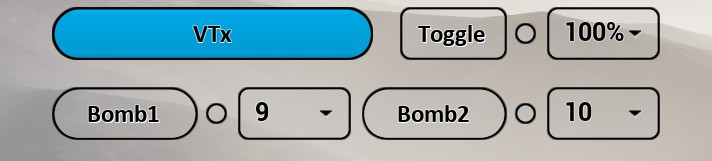
Depending on the drone type and selected bomb quantity, there may be different numbers of bomb drop control channels — from zero to six.
One
Two

Six
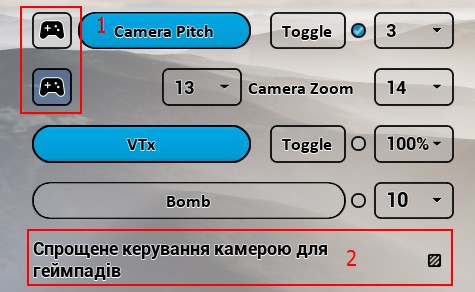
If you don’t have a controller and are using a gamepad, the gamepad logo button (1) allows you to assign the camera control to 2 buttons instead of an analog channel.
The checkbox (2) enables this for both camera channels at once, resulting in 4 buttons instead of 2 channels.
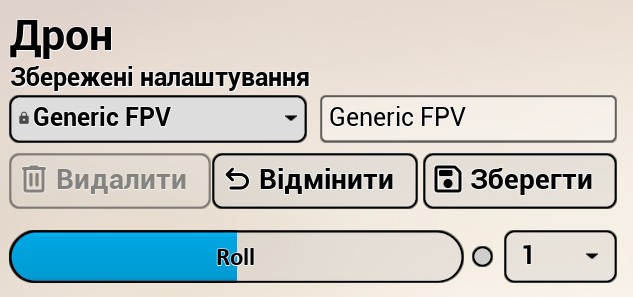
Once your channel configuration is set up, you can save, modify, or delete it. Some presets cannot be changed (indicated with a lock icon), but you can save their modified versions under different names. Then, select the saved configuration from the dropdown list.
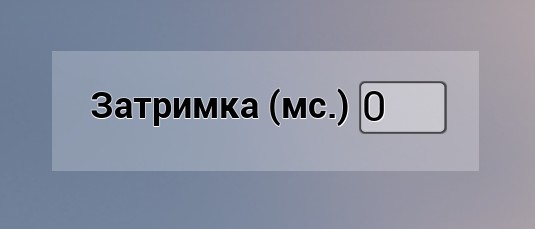
The controller configuration menu also allows you to set control delay in milliseconds. This can be useful for simulating digital communication lag.
There is also a Legacy Input option in this menu. It doesn't work when accessed from the main menu. Legacy Input is an older method of connecting and reading controller input. It should not be used, but if issues occur with the default method, it may perform better. Legacy Input only works during drone control and is unavailable in the main menu or tactical map.
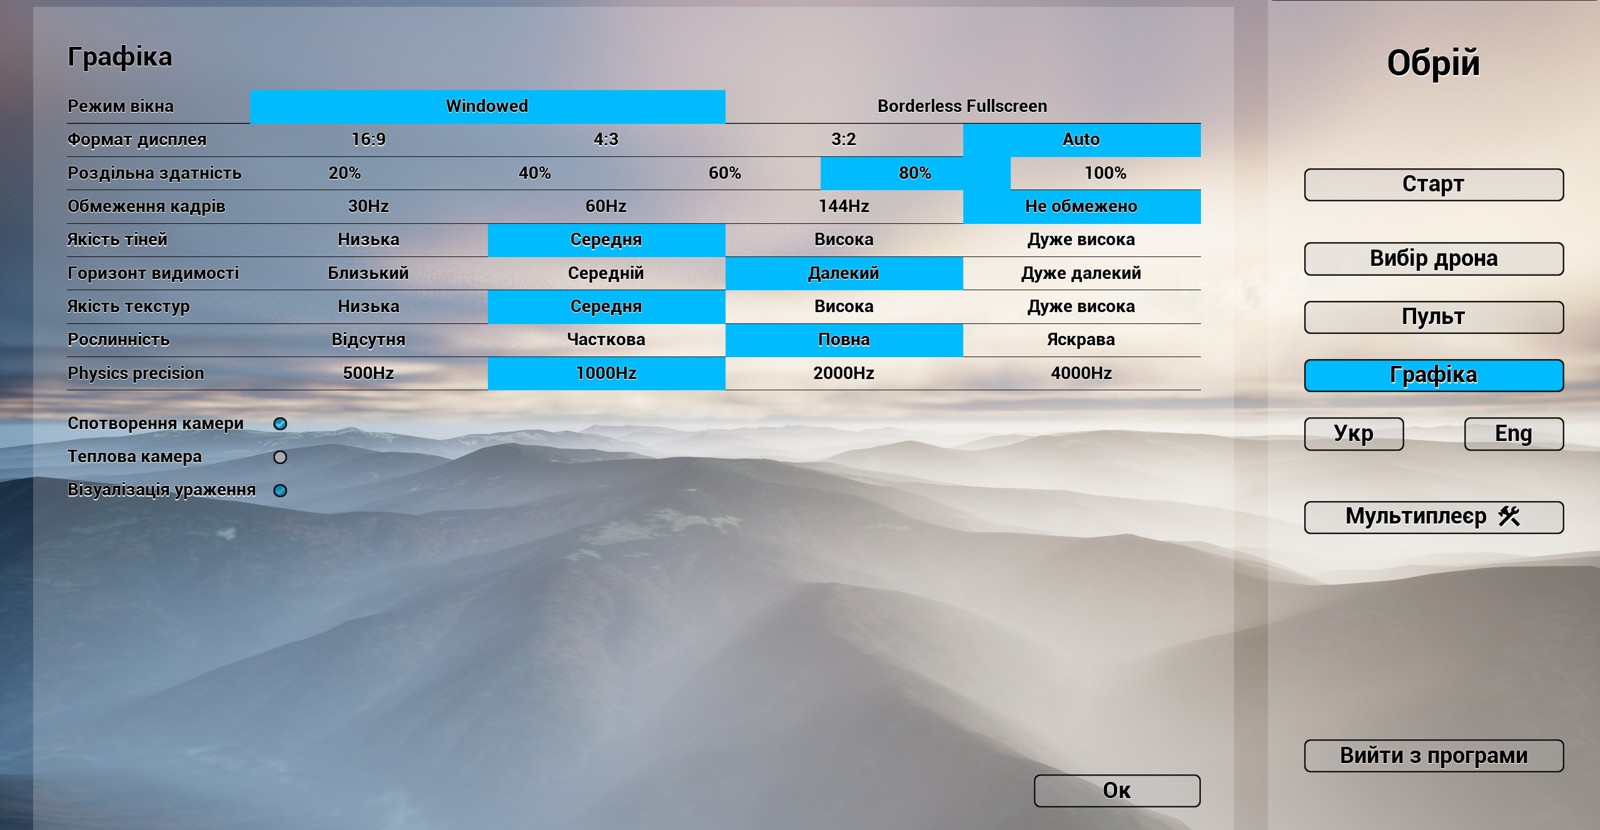
Graphics Menu#
Note
The recommended approach for tuning graphics settings is to increase them incrementally, ensuring the simulator remains stable after each adjustment:
- Set all options to minimum.
- Enable vegetation rendering.
- Enable shadows and increase texture quality.
- Gradually push the view distance toward maximum.
- Continue raising texture and shadow quality to the desired level.
The Camera Distortion option adds visible image warping and artifacts, simulating the wide field of view and image quality of FPV drone cameras. The Impact Visualization option lets you disable explosion animations if they overload your computer.
To simulate night flying, enable the Thermal Camera option. In this mode, the entire image turns gray, simulating a thermal imaging effect. Vehicles and infantry will appear as brighter, lighter-colored objects.
Note that the Vegetation toggle also affects building placement. With the Medium setting, regular residential buildings will disappear and only appear as textures on the ground (like in satellite imagery). Only unique structures like the Church will remain as 3D models.
Start Menu#
The Start button in the main menu opens the location selection screen.
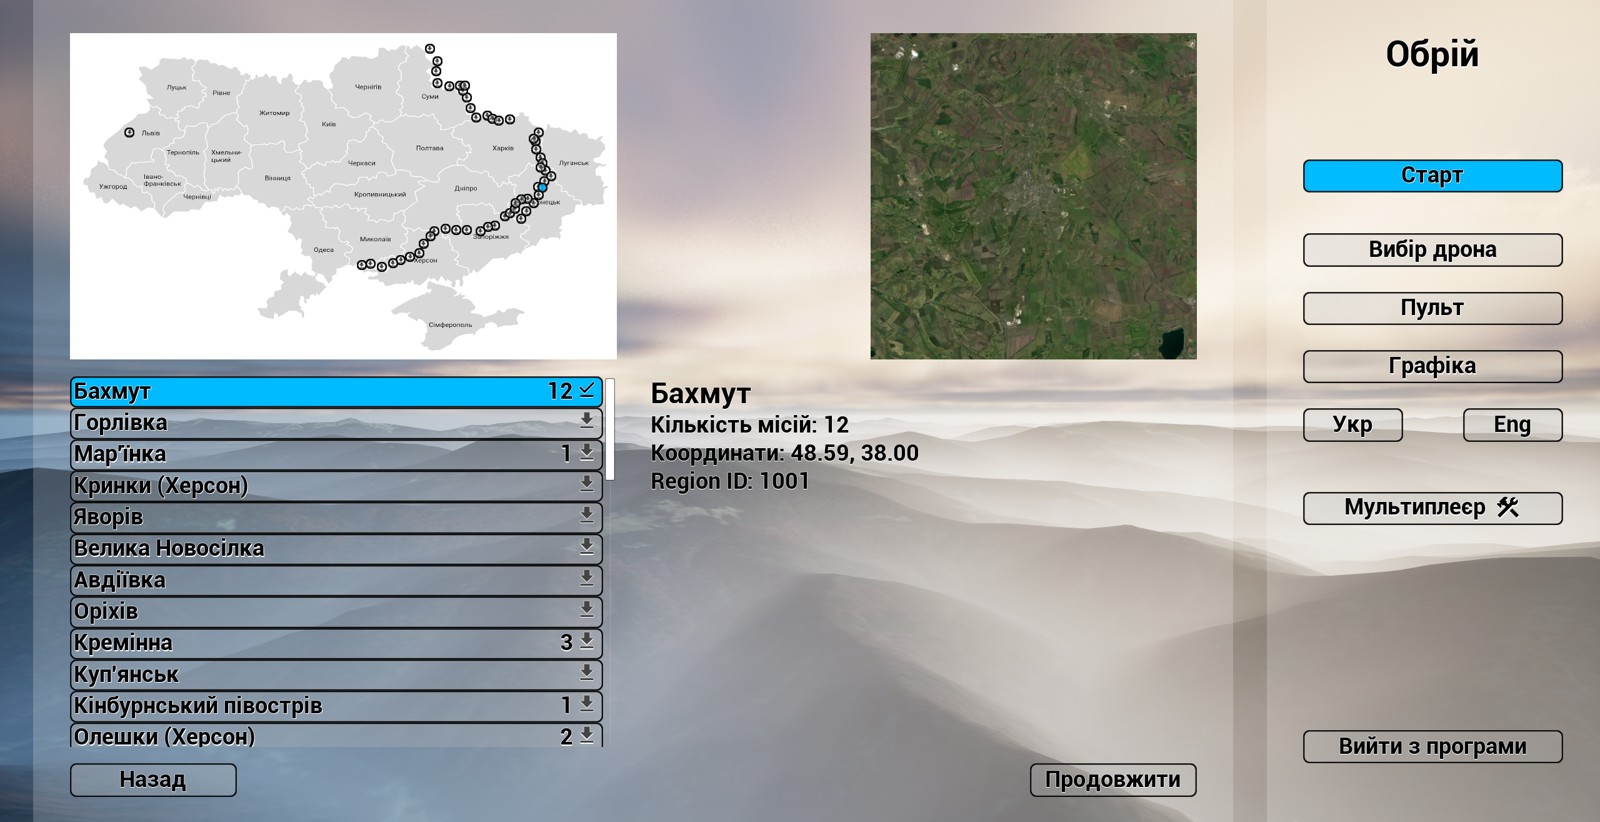
Location Selection Menu#
On the left side of the screen is a list of locations; on the right, there is a satellite map of the selected area (in this example, Bakhmut).
Note
You can request additional regions by contacting the developers.
A checkmark indicates downloaded maps. An arrow means the map needs to be downloaded from the server (ensure you have an Internet connection). A Download button will appear below the map, also showing how much space it requires.
Next, click Continue.
In the next menu, you can choose between free flight mode or performing predefined combat missions.
By default, there may be no available missions. However, some maps (like Bakhmut) will include a few example missions. The number of missions available for a map is shown as a number next to the download status icon.
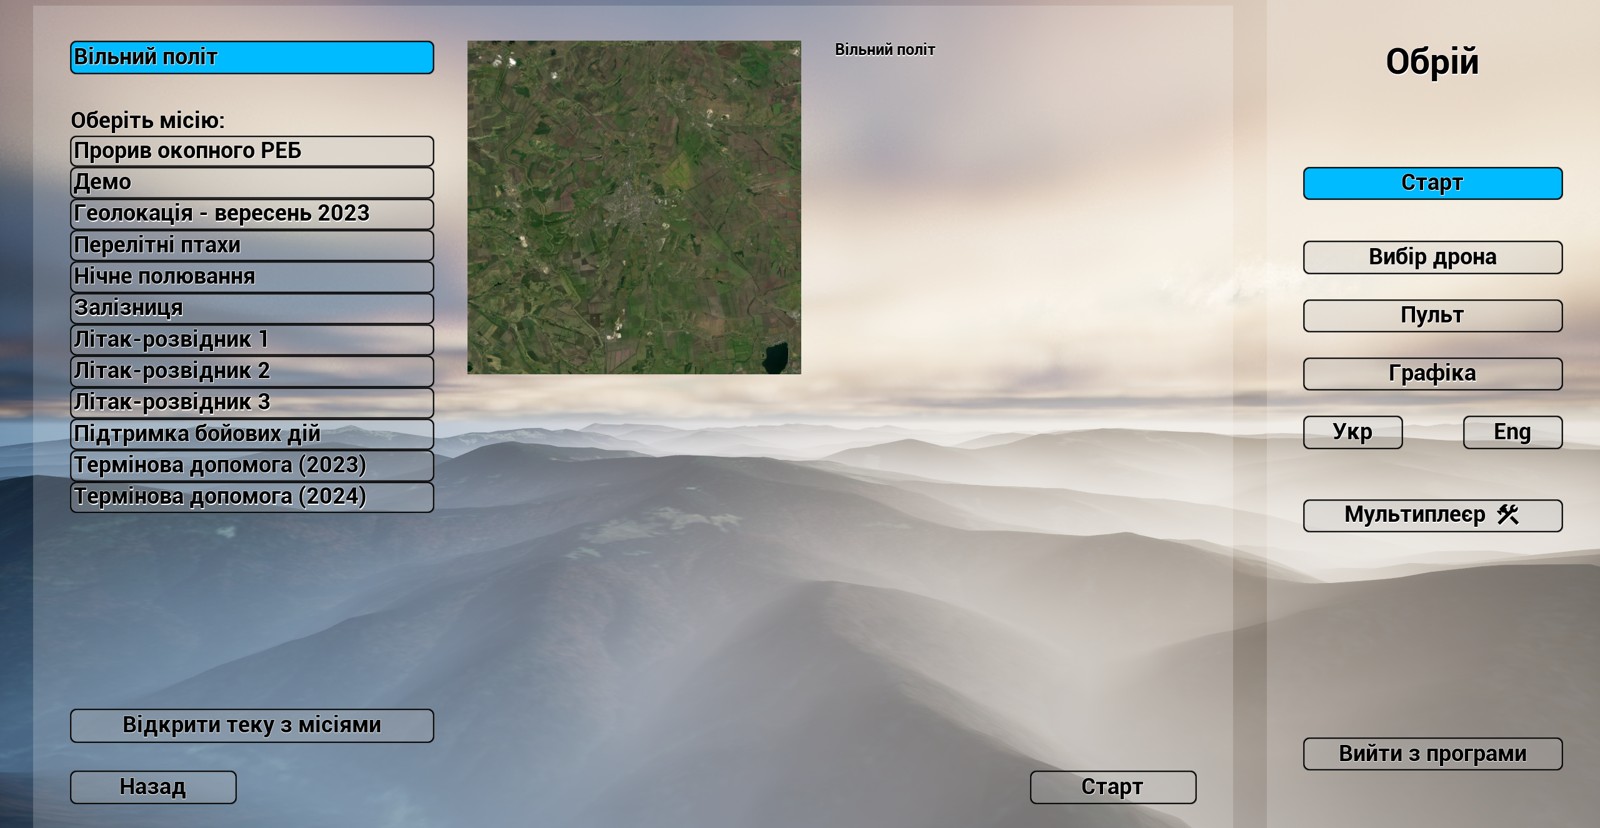
Clicking the Open Mission Folder button will open the mission file directory on your computer.
These mission files can be shared with other users. The mission creator can copy a file from this folder and send it to someone else, who can then place the file into their own mission folder.