Tactical Map
Tactical Map#

Use the mouse wheel, the — (hyphen), =, +, -, or keyboard touchpad to zoom in and out of the map to position your own and enemy objects. Use the W, A, S, and D keys or the middle mouse button to move around the map.
![]()
In the bottom left corner of the screen is a button that switches the satellite map to a terrain visualization of the area (and back when pressed again).
The map itself marks the line of contact (LoC). Different objects have different permissions regarding where they can be placed.
Note
Due to the movement of the LoC, the map may be shifted to maintain at least a five-kilometer zone from the line of contact, or the LoC may be removed entirely (as was done with the Bakhmut map).
Ground Station and Takeoff#
To begin, you need to place a takeoff point. After you click on the Takeoff icon, it will be highlighted with a white frame, indicating that the button is active. A tooltip will appear under the mouse cursor, showing which object is currently being placed. Then, click on the map at the desired takeoff point. If the object is placed incorrectly, you can drag it to another location using the left mouse button or enter new coordinates in the object's menu. The menu accepts longitude and latitude in decimal format in the WGS coordinate system. Custom altitude can be entered to launch in air.
The takeoff point can be placed in any of the three map zones — friendly positions, the gray zone (no man's land), or enemy territory.
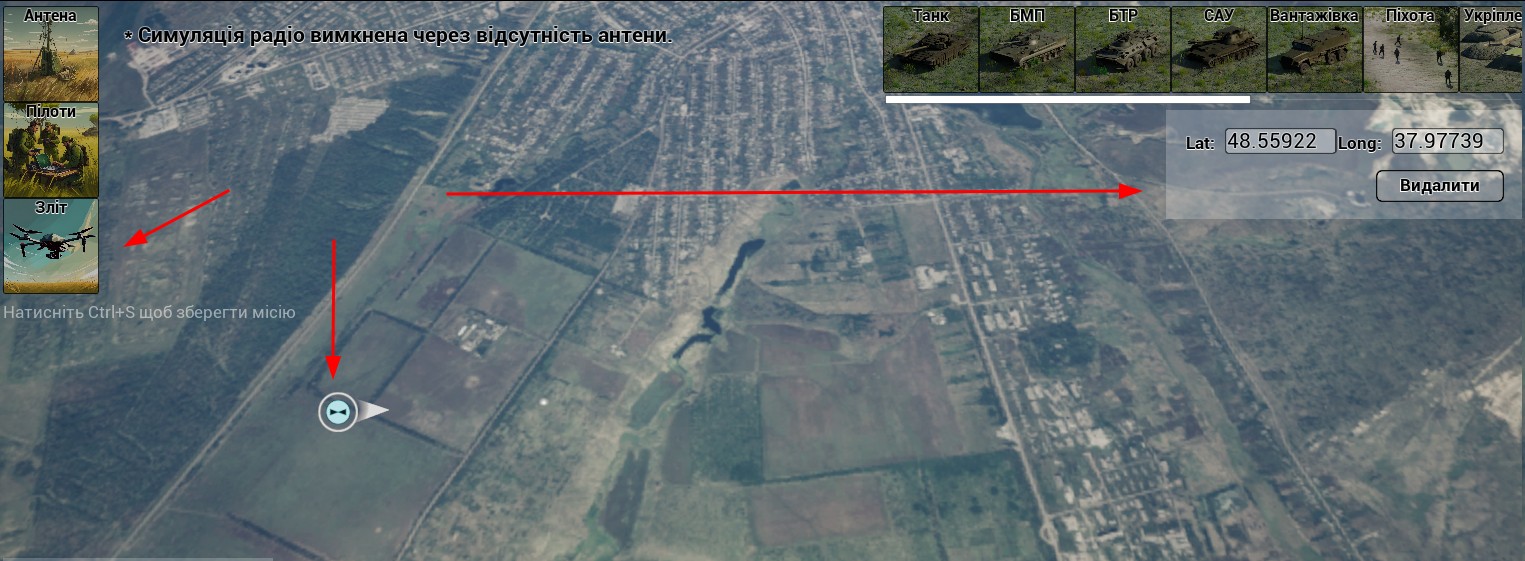
Once the takeoff point is set, you can choose the aircraft's nose direction at takeoff. A white triangle will follow the mouse cursor — click the left mouse button again to set the direction.
This is enough to unlock the Start button and begin the simulation.
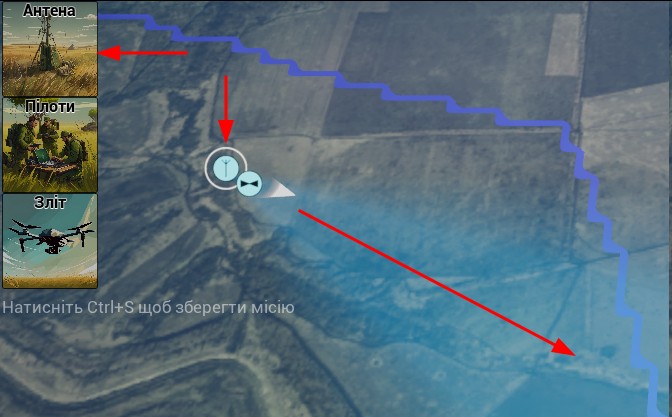
Additionally, you can place an antenna. The antenna is directional, and its orientation is set the same way as the drone’s nose direction — by clicking a second time on the map. The antenna's beam width is about 45 degrees. The simulator allows antennas to be placed only within friendly territory and the gray zone.
Warning
If the drone is placed outside the antenna’s coverage cone, the video signal will be absent when the simulation starts.
The antenna symbol represents a ground relay station, which determines the radio horizon and the power of control and video signals. Without an antenna, radio communication would not be simulated at all and would be considered ideal. EW will also not function without an antenna.
The Pilots symbol is used only for missions. It creates a restricted zone where pilots, takeoff points, and antennas can be placed.
Enemy Targets and Other Markers#

The BMP, Tank, APC, Truck, and SPG objects represent friendly or enemy forces, which can be either stationary or mobile.
For vehicles, the placement algorithm on the map is as follows:
- First left-click on the map sets the vehicle’s starting position.
- The second left click sets the orientation direction.
- Third and subsequent left-clicks place waypoints along which the vehicle will move back and forth. The route will be visualized with red moving dots. If you click twice in the same spot, a "fire mission" will be created: the vehicle will stop and fire for 30 seconds. Clicking three times will extend it to 60 seconds, and so on.
Click the right mouse button to finalize the trajectory or to skip this step and place a stationary target.
Placed vehicles can be dragged with the mouse, and their waypoints will be preserved.
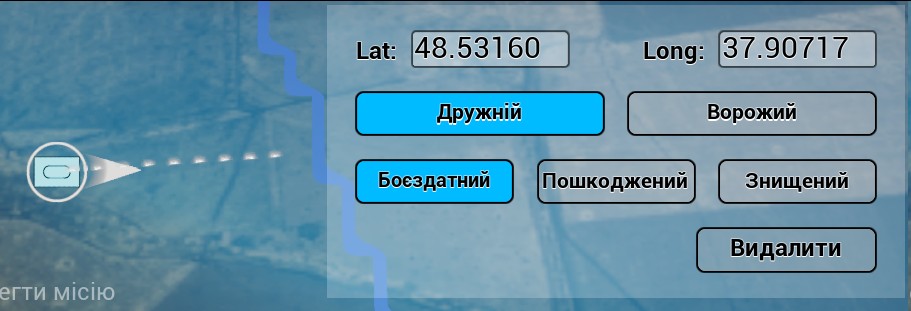
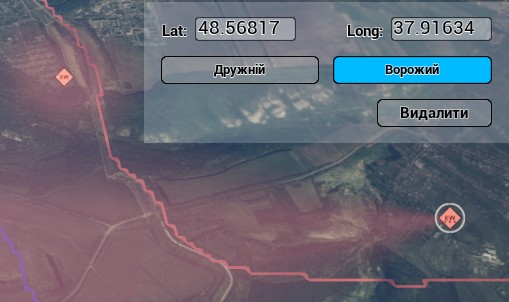
Additionally, in the object menu, you can change its identification (friendly or enemy), combat readiness (operational, damaged, destroyed), adjust coordinates, or delete it.
These parameters can be modified not only at the moment of creation: just click on an existing object to open its menu.
Friendly objects can be placed in friendly and neutral zones. Enemy objects can be placed in the neutral zone and enemy territory. Friendly vehicles cannot be destroyed. If you attempt to run your drone into a friendly vehicle, the drone will lose control, and an on-screen message will state that friendly fire is prohibited. Similarly, if a bomb is dropped on a friendly vehicle, there will be no explosion, and the same message will appear.
Operational vehicles can move and fire. If hit, they will change color and emit smoke. Damaged vehicles remain stationary with open hatches and can be finished off. Destroyed vehicles turn rusty, cannot move, and do not emit smoke, but they can serve as landmarks.
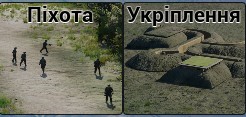
Infantry is a special symbol that generates five soldiers around it. They may attempt to shoot down a drone if they spot it, move around, and die when hit.
A fortification adds a trench with a bunker and a firing position to the map.
Fortifications and infantry can only be enemy units.
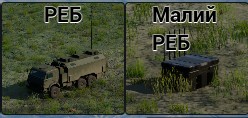
A directional EW system creates a cone in front of it where communication will be disrupted. Video quality will also degrade if your antenna is within the EW coverage zone.
A small stationary EW system creates a dome around itself and can protect vehicles and fortifications.
EW systems can be either enemy or friendly. Their placement rules are the same as those for vehicles.
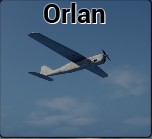
In Obriy, you can place an aerial target: an Orlan UAV. The procedure for setting its route is the same as for ground vehicles. However, when double-clicking on the same location, the aircraft will be assigned a loitering task, circling the point for 30 seconds. Triple-clicking extends this to 60 seconds, and so on. If no route is set, it will loiter around the takeoff point. Flight altitude can also be adjusted. An Orlan can be placed in all zones.
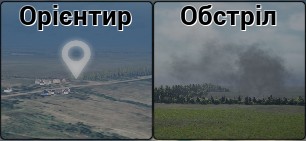
There are also two environmental objects — a Landmark and an Artillery Strike. Placing a Landmark on the map allows you to name it, and the name will appear as a floating label during the simulation. You can also choose to have the Landmark appear only on the minimap, making it invisible during flight.
An Artillery Strike marks a zone that will be subjected to shelling during the simulation. Shell impacts will destroy objects in this zone, including the drone.
Weather Conditions#
This menu also sets the mission's weather conditions. The weather selection tools are in the menu's bottom right corner.
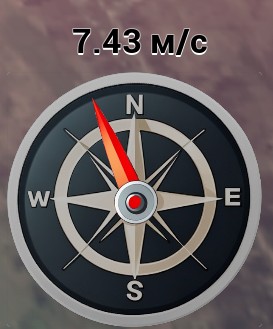
At the bottom right, you can set the wind direction and strength. Click the compass with the left mouse button and choose the wind direction. Clicking closer to the outer edge of the compass increases the wind strength. Wind gusts vary by approximately 20% of the base wind speed. The interface element displays wind strength at 10m altitude. Wind speed increases with altitude.
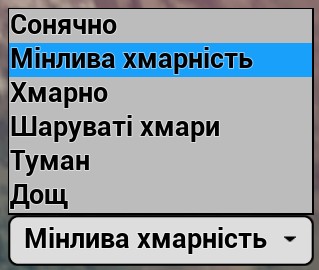
The upper dropdown menu allows you to select weather conditions.
- Sunny – No clouds
- Partly Cloudy – Cumulus clouds at 600–1700m, cirrus clouds at 12–14km
- Cloudy – Cumulus clouds at 600–2200m, cirrus clouds at 12–14km
- Overcast – Stratus clouds at 200–1500m, cirrus clouds at 12–14km
- Fog – Stratus clouds at up to 450m, cirrus clouds at 12–14km
- Rain – Cumulonimbus clouds at 600–3100m, cirrus clouds at 12–14km
During rain, water droplets appear on the lens. Gimbal drones can tilt the camera downward to let the water drain off.

The lower dropdown menu allows you to set the month and enter the time in the 00:00–23:59 format. Time-of-day changes are immediately reflected on the briefing map. The season affects vegetation, map textures, and sun altitude. In November, trees turn yellow; from January to March, trees have no leaves. The map texture adjusts accordingly.
Relay Station and Battery Parameters#
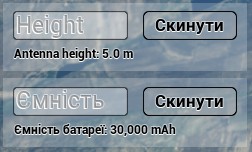
You can also adjust the altitude of the ground station (relay) and the battery capacity.
Warning
These values remain changed and do not automatically reset to default. Remember this when setting up future missions.
To start the simulation with the selected drone and mission, press Start.
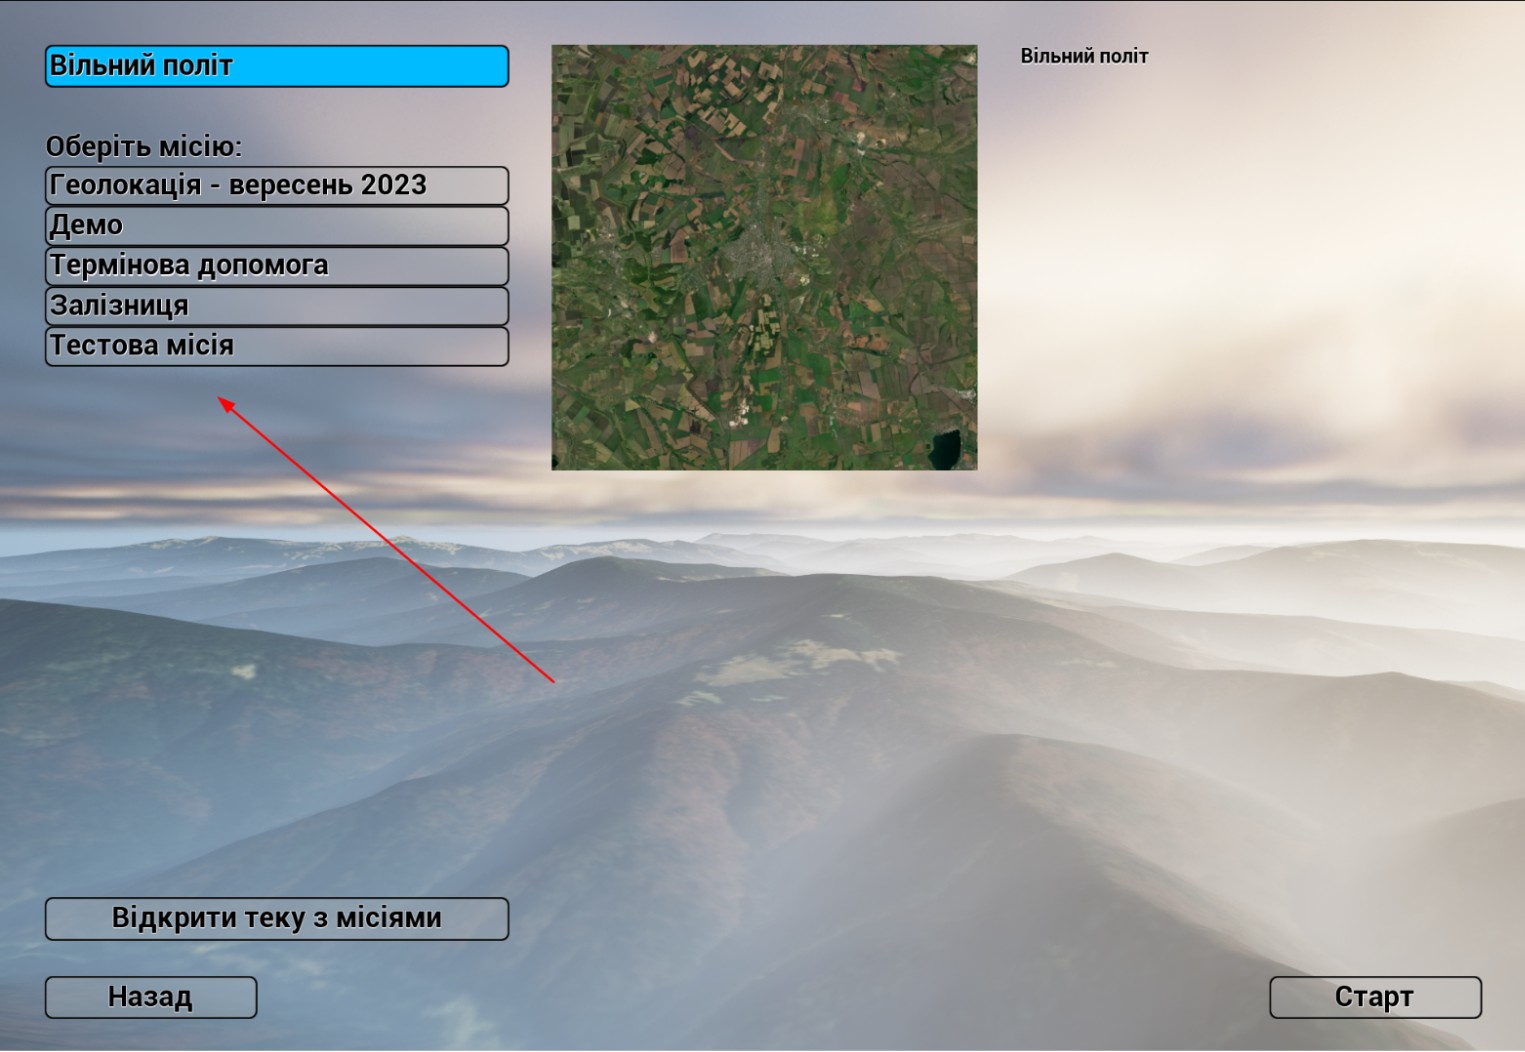
Missions#
All elements and parameters of a future mission can be saved to a file for reloading or sharing with another pilot. A new mission can be created using the Ctrl+S shortcut in the briefing menu.
Warning
Place all required symbols (antenna, takeoff, enemy forces) before pressing Ctrl+S. Changes will not be saved otherwise.
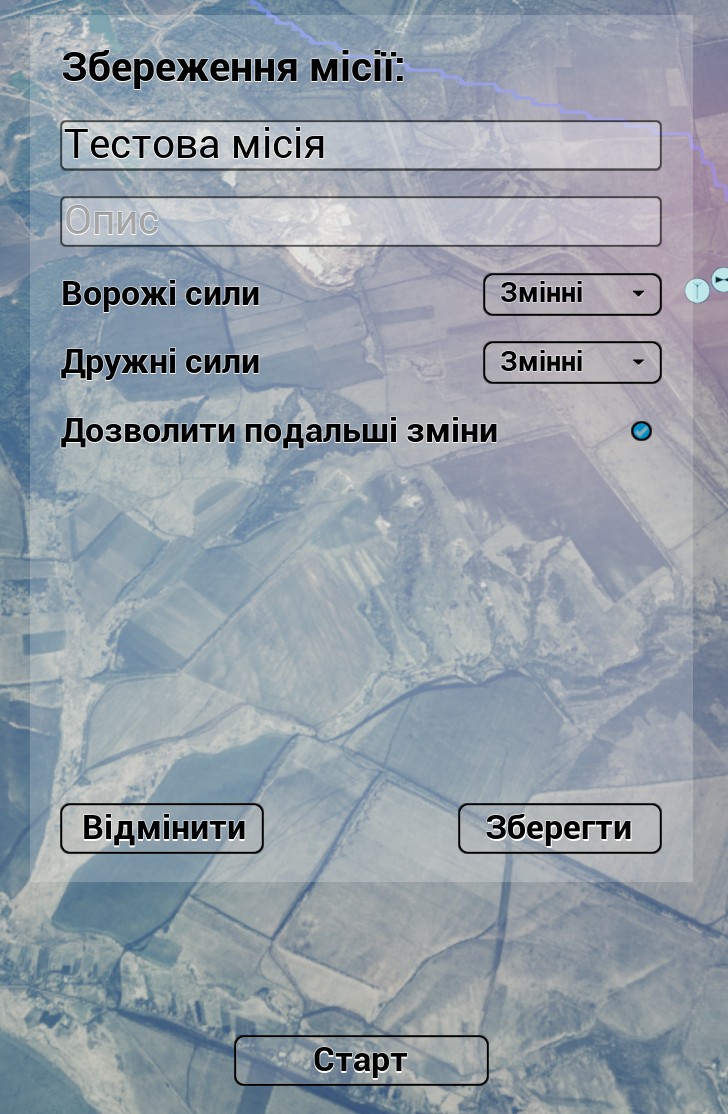
Missions allow you to lock or hide certain symbols and restrict or allow the creation of new ones. This lets an instructor create a mission that the pilot cannot modify or one where enemy unit locations remain unknown. Upon exiting to the main menu, the saved mission will appear in the list.
Missions can be edited manually, as they are saved in a text format, but care must be taken not to break the syntax.
Missions can be shared with other pilots. The mission selection screen has a Open Missions Folder button. This folder contains all mission files. You can send your file to another pilot or add a mission file received from another pilot to the folder.